
As discussed in Grip, the trigger finger also requires attention when it is placed on the trigger shoe. Ideally when the grip is attained, the trigger finger should fall onto the trigger shoe “naturally” and “comfortably” without any stretching to “find” the shoe or curled back towards the shoe.
The objective here is to have a trigger action which is smooth, deliberate, and controlled for optimum results. The action of the trigger finger requires the trigger shoe be pressed directly to the rear of the pistol, along the bore line of the pistol. Regardless if the athlete is using an ISSF pistol, or a revolver in the Service matches, the trigger requires the same method of release.
The revolver trigger finger, may start at a slight angle to the bore line, however as the shot is released, the trigger finger and trigger shoe, in its final stage, should have been pressed in a parallel fashion to the bore. ISSF pistols have the same principal, but with a lot less movement to release the shot.
It is advised that the triggers be set up so that, at the release of the shot, the trigger stops virtually against the backstop. This is to eliminate any backlash which hinders smooth trigger control, also stop the trigger “collapsing” after the shot break. Be aware that very close tolerances of this backstop, may interfere with sear engagement and release.
Now the question arises, “which part of the trigger finger should the trigger be pressed on”?
This is purely personal due to an athlete’s size of hand, joints, trigger, type of pistol being used. Here the athlete may require some outside assistance of a coach to determine the angle, distance, etc for placement.
Based upon our previous statements about being parallel etc. the trigger may require to be moved forward or back to accommodate the individual trigger finger requirements.
Most ISSF pistols have a two-stage trigger set-up. The first stage is generally a lot less weight than the second, final stage, but this also is personal. So the action would be, take up the first stage (or trigger slack) start to take up final stage pressure, shot fires and trigger “stops” against the back stop. It is also desirable that the final stage be a “crisp” break with no travel or creep. However, some of the turning target events may be better suited to a roll-off trigger, such as Rapid Fire, but again, purely personal.
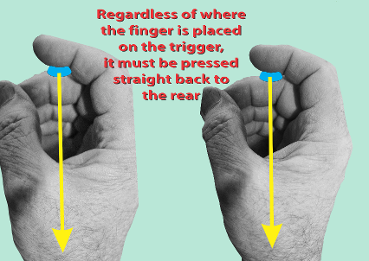
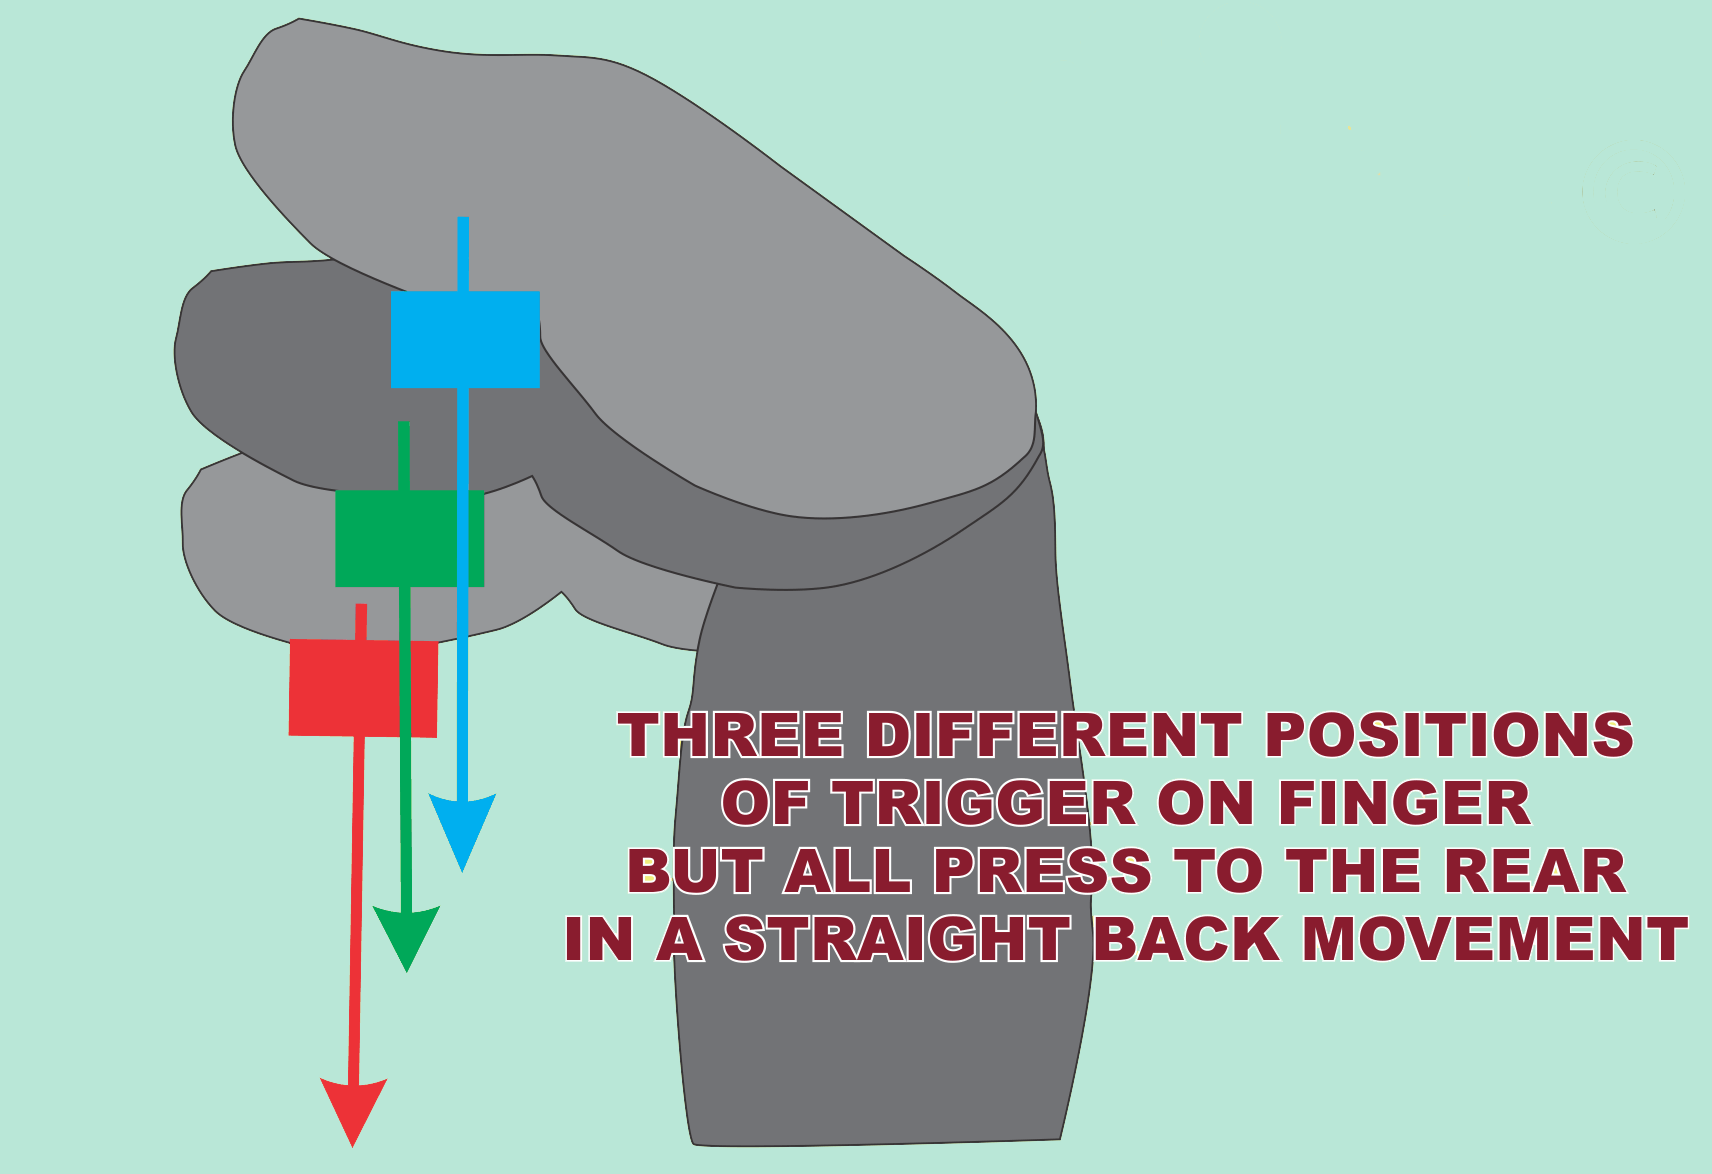
The main areas the trigger press being using are, the fingertip, middle of the pad, near the first joint or the crook of the joint. Again purely personal and dictated by the athletes ability to reach the trigger comfortably without reaching for the trigger shoe. The main criteria here is that at any point of pressing the trigger, it is done in a straight back motion.
A series of diagrams will explain the actions of the trigger application.
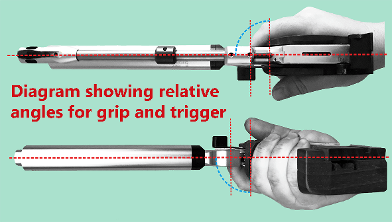
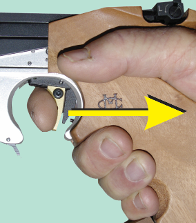
Diagrams above indicate trigger being pressed parallel to the bore line
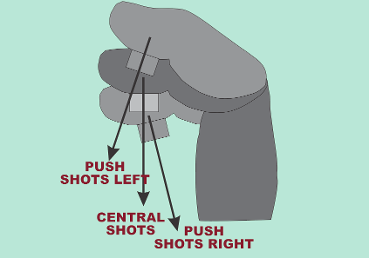
Scenarios which may cause erratic shots.
All utilize the centre of the pad up the
shot breaks at different angles which can
cause muzzle movement at shot release.
Diagram with slightly different trigger pad positions, but both are directed to the rear in a straight line to the bore.
Three different positions of trigger shoe,
but all pressed directly to the rear.
Make a free website with Yola
